

Twice a year I volunteer to photograph a dress rehearsal of the then-current production of Opera Southwest, our regional opera company. (You can see my previous posts about OSW productions of Pagliacci, Aida, La boheme, Amleto, and The Pearl Fishers by clicking on the link to each.)
This fall's OSW production was Gioachino Rossini's Guillaume Tell (yes, the one with the famous high-energy finale of its overture). Tell was Rossini's last opera, composed at age 38, though he lived another 39 years afterwards, and he essentially threw everything he had into it: the original production was over four hours long! Due to its length, the complete opera is rarely produced, but even in a shortened version OSW's production was over 3 hours long.
Rather than recap the story of the opera with photographs as I have done in previous posts, I'd like to share with you some of my strategies for photographing the dress rehearsal.
As with the Balloon Fiesta (see my previous post), an opera presents ready-made opportunities for powerful images: besides being wonderful singers, the performers are well-trained actors, skilled in movement, gesture, and facial expressions to communicate the emotions of their characters. In any opera, there is no shortage of emotional moments to be captured.


And as with the Balloon Fiesta, the challenge for a photographer is to be in the right place at the right time to capture those moments. A dress rehearsal is a live event for which there are no re-takes, except when the conductor stops the performance for a re-do (which happens infrequently and not at the photographer's request).
The first step toward getting those images is preparation. Before I go to the dress rehearsal, I read a synopsis of the opera and watch a production on You Tube, so that I know who the characters are, how they interact, and when the crucial moments occur.
At the dress rehearsal, I have the run of the front of the house, from the back of the hall . . .

right up to the orchestra pit.

I am constantly moving, trying to get the best angle on the action I'm photographing. (Because it's a dress rehearsal, there are usually only about 15-20 people in the audience -- mostly Opera Southwest staff and board members.)
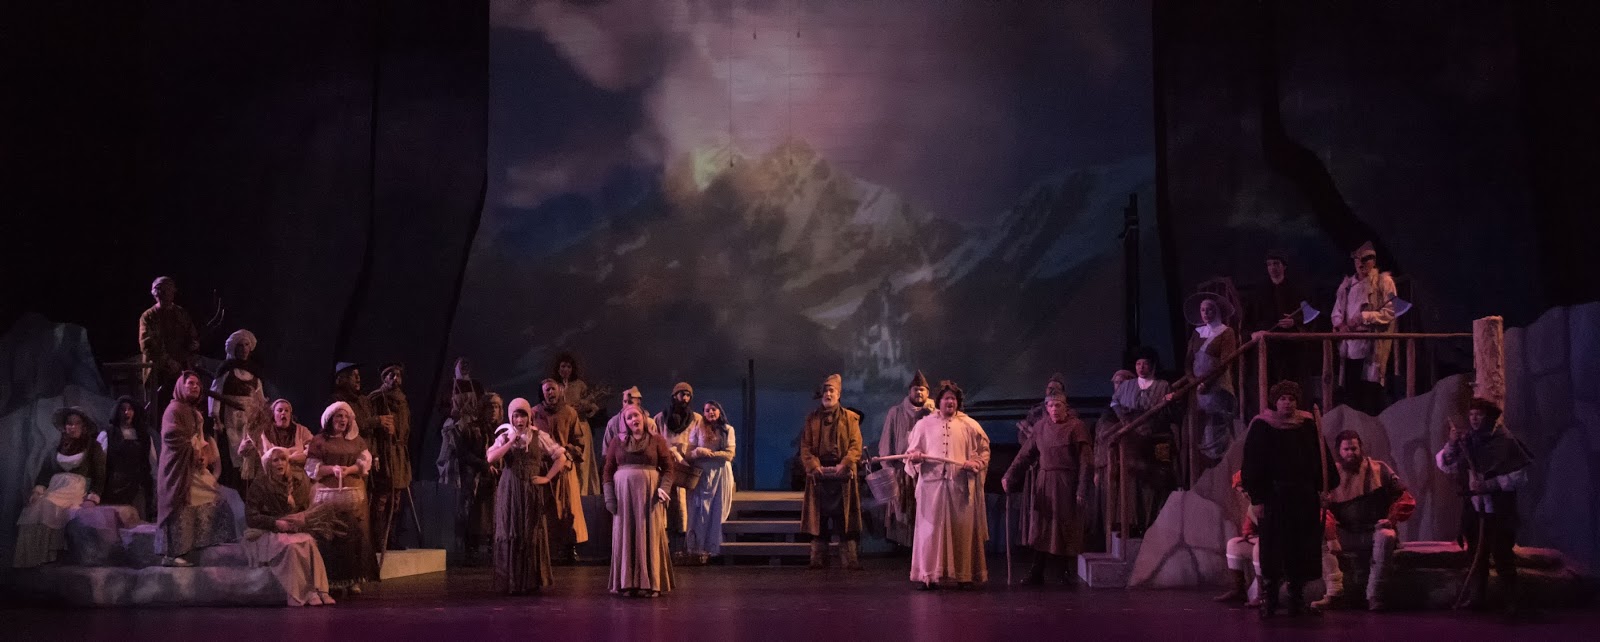
Most of my shots are from the edge of the pit, which puts me about 20 feet from the stage, as you can see from this shot:

I use an 18-200mm lens, which allows me to get wide shots as well as close-ups from the same position. Of course, for images of the full stage I have to move further away . . .
or, if the moment is right and everyone is stationary (a very rare occurrence!), I can take a quick series of images and stitch them together as a panorama:


When the stage is filled with dozens (if not scores) of singers and lots of movement I opt for wide shots to capture the spectacle . . .


. . . and lots of middle-distance shots to get closer to the action:


For the solo arias, duets, and trios, however, I try to get visually closer to the singers, to capture the relationships between the characters and the emotions they are conveying with their faces and gestures connected to the singing you aren't hearing.


This is sometimes more difficult than it might seem, especially in situations where two singers are widely separated on stage, as in this image, making for a visually bad picture:

My solution is to shoot these from a side angle to get both singers closer together in the frame even though they are far apart on the stage:

In a live production, people move and expressions change quickly. It's like trying to capture lightning: if you wait to push the shutter button until you see the lightning, it's over and gone before the shutter opens. So to get images at just the right moment, I overshoot -- that is, I use bursts of 5 or 6 or more images in quick succession. (And as a consequence, I shot over 2,100 images during the evening!)
Here's an example. The following 12 images were made within the space of 4 seconds. Which one would you choose?
 |
| No. 1 |
 |
| No. 2 |
 |
| No. 3 |
 |
| No. 4 |
 |
| No. 5 |
 |
| No. 6 |
 |
| No. 7 |
 |
| No. 8 |
 |
| No. 9 |
 |
| No. 10 |
 |
| No. 11 |
 |
| No. 12 |
As you can see, I started wide, but after the first two shots I zoomed in tighter. Given the choices, I thought images 1-4 were not particularly good. Images 5 and 6 were good possibilities. I didn't like the woman running off to the left in 7 and 8.
Image 9 looks good, but has some extraneous stuff in it. In No. 10, the male of the couple is blocking one of the people holding the boughs, so that won't work. And by 11 and 12, the show is over.
So we're down to 5, 6, and 9. I like both 5 and 6 because the single woman in the center gives a good focal point, but the couple on the right is somewhat distracting in both images. So I moved to No. 9.
What attracts me about No. 9 is the woman in the center of the image.

She is perfectly lit, and the swirl of her skirt and the angle of her head, along with the people on either side, reminded me of Venus in Botticelli's painting, The Birth of Venus.

The presence of the man -- her partner -- in No. 9 doesn't bother me, as he is hardly noticeable. So No. 9 was my choice.
But it wasn't quite right. There are extraneous and distracting elements on both sides of the image that don't support the idea of the image, as well as empty space at the top and bottom of the image. So I cropped them out . . . et voilà!


Cropping images in post-processing is a useful tool for getting better images. Naturally, I try to get the subject of an image in the frame and into the camera the way I want it to look. But things happen so quickly, it's not always possible. Sometimes, as in the example above, an image can be improved by leaving things out.
One of the other challenges of photographing an opera is stage lighting. Perhaps more than other forms of live theatre, opera uses stage lighting to convey mood and/or emotion, as well as time of day. The camera simply records what it sees, which means that without knowing the story and the music, the viewer may be confronted with a strangely colored image. Here's an example:

With software I have the ability to adjust the color to make it look more "normal" in the image:

Sometimes I will make the adjustment; other times, I leave it alone because that's the way the stage director and lighting director wanted it to look. For example, I think the image below works better with stage lighting than with "normal" lighting.


Whether you like the stage lighting or the adjusted lighting, it's a beautifully lit scene -- thanks to the lighting director and the technicians who set and control the lights.
There are more of those scenes throughout the opera, which I try to capture. In photographs, with the motion frozen, some look like Renaissance paintings or tableaux vivants.


Finally, of course, for every good image there are a dozen bad ones. Some just don't work . . .

Or someone is looking the wrong way at the moment the shutter opened:

Or, as in many family group photos, someone has their eyes closed:

Some images come close to being good, but for one reason or another can't be fixed. Here's one:

Unfortunately there is no Stump Removal Tool in Photoshop or Lightroom.
Although it's sometimes frustrating . . . and certainly a lot of work to capture, select, and edit thousands of images . . . in the final analysis I have found shooting operas challenging, exciting, and gratifying.

If you would like to see these images (the good ones, that is) and more from the opera in a larger format, please visit my photography website, Todos Juntos Photography, by clicking here.
Enjoy!